Sunday, February 19, 2012

Not everything "Supersized" 
has to be BAD...

Especially if it is for FREE!!

I recently came across this pretty cool web site called "Block Posters"  
This site allows you to create ANY size wall posters from ANY size images 
and it is totally FREE
Now if that isn't something to smile about .....
Making these very cool Block Posters is very easy ...
All you have to do is upload any image you like (jpeg)

Then you "slice" your image into how ever many pages you would like your poster to be?
It will let you know that if you slice your image into lets say ...
     -> 6 pages that your poster will be 4 ft x 2.5 ft .... 
       -> 8 pages it will be 5' ft x 3' ft ... and so on - you get the idea :)

Once that is done you simply click continue...
    and the site will create a "PDF" file for you

Then all that's left to do is print your pages and yes you know it ...
              Get busy hanging them up....

*** 

Check out some of the sample pictures below -> 
I think they are pretty darn cool.... 
"CARS"  
Well I know a little ones that would just love this one
Or how about this one.....

You may not know who they are, 
but your Teen does ;)


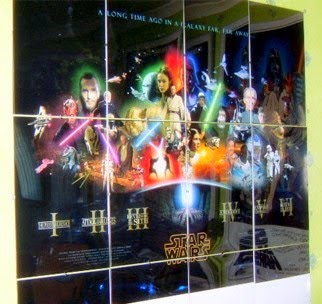
May the Force be with you->

I believe a few of us know this one well 
Bella who..? Edward ..what???
                            Twilight ...what's that ...
NOW IF THAT DOESN'T MELT ANY GIRLS HEART ....
^^^^^^^^
 
WELL DO I NEED TO SAY MORE ....
ONE OF THE MOST LOVED VIDEO GAMES
HAVING THIS IN "LIFE SIZE" COULD HAVE A STRANGE & CALMING EFFECT 
FOR A DIE HARD EPIC / GEARS OF WAR FAN


So what are you waiting for...
go and have some fun
with makings posters.....

Sunday, February 12, 2012

Bringing it to live.....

Sometimes I have simply too many ideas floating around in my head
and I either need to bring them to live or at least start with putting them on paper
and then little by little ....step by step get started on them
Because if I don't then I think there is a possibility that my head may explode at some point!
>>>
I have always been in "LOVE" with Captain America...
Actually this love goes way back... all the way to my young years in good old Germany!

How about you?
No.... Yes ... Maybe
Not sure .... Well guess what -> 
I know that this little cute boy of yours really likes Captain America ....
and something tells me that little boys all over town are just tired of the same ole' Room Decor 
So how about this one for starters....

Original design by Deutscher Design
The Captain America Design will be available for purchase through our e-bay store shortly
However if you can't wait .... if you MUST have it now ....
Well, just send us an e-mail so we can get started on your little Boys custom order ....

Stay tuned ... there is much more to come :)


Sunday, January 8, 2012

*** New Year *** New Art ***

                                        
Well if you have been following my little blog thingy, you know that I am all about affordable Home Decor. Especially since not everyone can afford $500.00 + art pieces. 
So here is something I stumbled upon which I think is pretty unique and as always most importantly it will not break the bank :) 

Did you realize that a simple piece of plywood, a little paint and a couple small shelves can easily become a unexpected work of art!?

Interested? Well here is how you do it:
  • Find a piece of plywood > 2"x 2" (at any Lowes or Home Depot), look for one that has an interesting pattern with contrasting light and dark wood.  
  • Sand down the most interesting side by using fine-grade sandpaper 
  • Next take your White water-based paint, OR any other color you prefer and add water (one part water to one part paint)
  • Then paint the lighter grain in the wood using the water/paint solution. 
  • Apply multiple coats to add more contrast. 
  • Let it dry... 
  • Next apply two coats of Minwax Polycrylic. Let that dry as well... 
  • Now cut a 1” x 3” x 6" piece of pine wood into two pieces.
  • Those you will use as shelves (14" and 10") 
  • Btw. If you don't have a saw you can just ask one of the friendly  Store employees, they will cut the wood for you :)
  • Then from behind the plywood, take two 1.5" screws and attach the 14" shelf about 4" from the bottom and 3" from the right edge.  
  • Next attach the 10" shelf about 7.5" from the bottom and extending 2.5" from the right edge. 
  • Attach 2 D-Rings to the back of the artwork, place them about 2" down from the top and 2" from the side


    * Hang your newly created art in a desired spot *
    * Voila all done *

    Shopping list:
    - Plywood - 2ft x 2ft ($2.50)
    - One piece of pine wood- 1” x 3” x 6" ($2.00)
    - White Water based paint (or any other color) 
    - small can of Minwax Polycrylic
    - Four 1.5" wood screws
    - Two D-Rings
    Lowes creative ideas