Showing posts with label Home Decor. Show all posts

Wednesday, October 3, 2012

Hallo Halloween......


Candles - Candles - Candles ....
I love candles, well who doesn't ... they just make everything so much cozier especially around the holidays and since it is almost Halloween I thought this idea would be cute little fun project 

You will need:
  • Several small & big glass cups (check your local Dollar stores)
  • Orange translucent paper 
  • White translucent paper
  • Black craft paper
  • Scissors 
  • Glue 
  • Tea light candles 

    .... and here is how you do it 
     
  • Take the orange translucent paper and glue it around the small glass cups
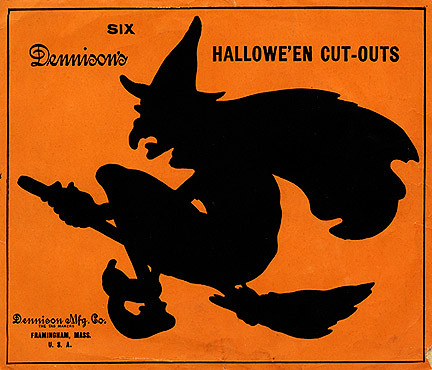
  • Next take your black craft paper and cut out little Pumpkins, Ghost's or Witches then glue them on top of the now orange glass cup
  • Then take the white translucent paper and wrap it around the big glass cups (If you have one of those "zick-zack scissors" you can use them to cut the top of the translucent paper)
  • Place a tea light candle inside the small glass cup and place the small glass cup inside the big glass cup.
 *** Voila - all done ***

Sunday, September 2, 2012

Pretty little Pumpkin's ....


How about some quick & easy fall decor for your home.....


I am sure everyone has a old vase somewhere, maybe the one that came with the last Valentines flowers ... well here is an idea where you can finally put them to good use and it won't take longer then 15 minutes...


All you need is:

Here is how you do it:
  • Place the dried Berries in the bottom of the vase
  • Take your little pumpkins and place them in your vase. It looks best if you layer the pumpkins by their different colors or sizes
  • Take your decorative ribbon and tie a cute little bow around the top of your vase
*** Voila - all done ***


Friday, August 10, 2012

Gorgeous Fall Table Decor


Fall is right around the corner and before you know it the leaves will turn colors and everything will look just amazingly beautiful
So maybe if we create some gorgeous looking Fall Centerpieces
it will hurry up and get here quicker :)

Just perfect for someone that doesn't really like huge elaborate "Flower Power" arrangements but still would love some kind of table decor. 
Well and if you ask me I think "Less is More" anyway and of course as always it is very easy to make :)

One single decor piece requires the following items:  
  • Two 8" x 10" clear acrylic sheets. If you prefer a three-piece grouping you need six acrylic sheets. You can find those in your local hardware store i.e. Lowe's, Home Depot etc. (glass cutting area)
  • Leaves... a bunch of pretty color full leaves (Michael's)
  • Simple glass cups (one per setting)
  • Small candles - simple or not it's your choice

Next lay one or two or three acrylic sheets -depending on how many you are making, on your table
Place the flattened leaves and or petals on top
Then cover the leaves and or petals with the remaining acrylic sheets
Place the small candles in glass candle holders on top of the acrylic sheets
and guess what ..... 
Voila all done 

Tuesday, June 12, 2012

How about giving the "Old Shady" one...
                          a brand spanking "New Look"


I am sure somewhere in your attic or basement you got one of those old and ugly lamps stashed away... and that poor ugly lamp is just waiting for you to find it so you can bring it back to live with a little paint and some beautiful fabric...

*****

All you need is.... 

  • That "Old Shady Lamp"
  • Your favorite Printed Cotton Fabric
  • Spray Glue for Fabric
  • Black Satin Paint
  • Velvet Ribbon 
  • Double-Sided Tape  
  • Ruler, Fabric Marker, Scissors, Paint Brush, Clothespins  
  • Sandpaper (for Metal)  

 >>>>><<<<<

Dress her up...


Place the fabric face down on a table... 
then take the lamp shade using your ruler as guide make several marks where the fabric needs to be cut in order to fit the lamp shade - cut the fabric to size...


Make it stick...


Next... apply your spray glue to the back of your fabric... wait a few seconds, then press the fabric firmly around the shade -
take the clothespins and temporarily secure the fabric to the shade.
Now take the double sided tape and apply it to the back of the velvet ribbon... place the ribbon to the top and bottom edge of the shade...

From Color to finish...

Take the sandpaper and slightly sand down the base of your lamp...
next apply two coats of the black sating paint... let everything dry

Voila... All done


MADELYN VALANCE
(Customer provided Fabric)
 
This gorgeous custom valance style has a pleated underskirt (optional) 
and can be adapted to fit any size window in your home.... 

The gusset section and side jabots are self-lined in the same fabric as the main fabric with a small covered piping along the bottom edge. 
The swag sections will be lined in regular ivory or white drapery lining
However, a decorative trim or piping will be added to prevent the lining from showing at the bottom of the treatment.The valance will be board mounted and the finished length of the valance is approximately 22” inches 


In order to have this gorgeous valance custom made by Deutscher Design
please provide us with the following fabric yardage
 Fabric requirements:

Valance Width Up to 42”->     ($95.00)
1 yards of decorative fabric for main fabric*
3 yards of contrast fabric for pleated underskirt and to cover buttons and piping

Valance Width Up to 56”->    ($120.00)
2 yards of decorative fabric for main fabric*
4 yards of contrast fabric for pleated underskirt and to cover buttons and piping
**** 

*   Based on 54” wide fabric
** Lining, Interlining & Piping will be provided by Deutscher Design

Monday, June 11, 2012

LACE-UP VALANCE
(Customer provided Fabric)

This beautiful contemporary valance with mock pleats and decorative lace up ties can be custom made to fit any window width in any room in your home...

The Lace-Up Valance can be attached to the wall by using decorative knobs 
with post adapters to project the valance away from the wall or it can also be 
board mounted ... The valance is fully lined as well as interlined and the finished length is approximately 22" inches


In order to have this gorgeous valance custom made by Deutscher Design
please provide us with the following fabric yardage
 
 Fabric requirements:

Valance Width Up to 42”->     ($85.00)
1 1/2 yards of decorative fabric for main fabric*
1 yard of contrast fabric for the mock pleats and for the ties & piping 

Valance Width Up to 56”->    ($105.00)
• 2 yards of decorative fabric for main fabric*
• 1.5 yards of contrast fabric for mock pleats and for the ties & piping

Valance Width Up to 70”->    ($125.00)
• 2 yards of decorative fabric for main fabric*
• 1.5 yards of contrast fabric for mock pleats and for the ties & piping

Valance Width Up to 84”->    ($150.00)
• 3 yards of decorative fabric for main fabric*
• 2 yards of contrast fabric for mock pleats and for the ties & piping

**** 
*   Based on 54” wide fabric
** Lining, Interlining & Piping will be provided by Deutscher Design


Sunday, May 20, 2012

Light up your Summer Night Party...
with Rainbow Glow Lights of the Deep Blue Sea....

Have you ever had a chance to experience the captivating glow of the 
mysterious jellyfish... those translucent creatures of the Deep Blue Sea...

Well how about turning your next Summer Night Dinner Party 
into one enchanting & captivating experience after dark...
by adding these stunning "Glowing Flowing Sea Lights"....

 ~~~~~~~~~

I know you can't wait to start this amazing project so here is what
You will need ->


  • One round Plastic Bowl each - White or semi-transparent (approx 15" inches)
  •  Textured Rice Paper in White and Pink (Arts & Craft Shop)
  •  Organza ribbon in White and Pink, about 1-2" inches wide
  •  Bookbinding Glue or Wallpaper Paste
  •  Hot Glue Gun
  •  Flat brush
  •  Packing Cording - White
  •  Scissors
  •  Drill
  •  Light kit for hanging Lanterns

Step by Step instructions ->


  • First drill a larger hole in the bottom of each bowl, this is where your will string your lantern light kit through in the end
  • Take Six (6) equally long pieces of the White packing cord and glue them with your hot glue gun onto the bowl. Place them so that the round surface is divided into six equal segments (see pic) 
  • Now take the Pink Rice Paper and cut it into wide strips. With your brush apply the bookbinding glue and place your pink paper strips over each packing cords, it is OK for the paper strips to overlap about 4" inches at the end of the bowl. Repeat this with a second layer of Pink Rice Paper  
  • Repeat step #3 with two layers of white rice paper, let everything dry completely
  • Now cut your organza ribbons in three different lengths, take your hot glue gun and glue the organza ribbon strips inside the bowl - Start with the longest ribbon first and alternate colors - First White... then one Pink strip.
  • Repeat this task with the second set of the organza strips and finally a third time with the shortest strips. Make sure to be very careful while working with that hot glue gun because it can easily damage the plastic bowl as well as the organza strips.
  • Once all the strips are glued on take a scissor to curl your ribbons (same method as wrapping a birthday present)
  • Finally, take your Lantern light kit and string it through the large whole in the center of the bowl. Also make sure you use halogen light bulbs that way your organza ribbons will NOT catch on fire
  

Look at this... simply breathtaking

Friday, May 4, 2012

Happiness is a summer breeze...
with sand between your toes...
& Friends by your side...

I think I can say that many of us are so very ready for our summer fun at the beach to finally get here... and I guess depending on where you live for some the summer has already started while a few others anxiously awaiting for Miss Sunshine to finally arrive...


Either way I figured no matter where you are we all love beautiful Beach Decor... especially if it helps to ease that long wait until we finally get to feel the sand between our toes....

----***----

Gorgeous Beach Candlelight Decor....

Things you need:

  • Large Glass Vase
  • Sand (Michael's)
  • Decorative Seashells 
  • Medium Candle (size depends on glass vase) 
 Super simple....
Just fill the bottom of your glass vase with sand... 
next place your candle in the center of the vase...
then place your decorative shells around the candle...
Voila - All done... 


Wednesday, April 18, 2012

Giving you a reason to hang it up.....


Check out this awesome little hang out up spot ...
You know we all could use one of those neat corners, 
if anything at least we would never have to search for our key's again because they finally have a place where they belong...


Of course as far as I'm concerned with all of our cool DIY projects there are no rules as far as what colors or theme's you prefer this or any project to be .... 
Our general rule of thumb is "whatever floats your boat" 
However just to give you some ideas I figured why not list a few really unique fabrics and hooks that I found on Etsy and I think would work really well with this project....


Fabric - Landmarks in Europe on Linen (Etsy)
Fabric - Vintage Paris Cotton Blend (Etsy)
Toile Fabric Antique Landmarks (Etsy)
Antique Pink Paris (Etsy)
Toile Fabric Blue European Landmarks (Etsy)
***
While searching up and down the "Etsy coast"...
I also happened to come across some really cool hooks 
that would work perfect with our little project...


So what do you think...
    You ready to rock n' roll with this awesome project???

If so then here is everything you will need:
    - Three (3) Natural Wood Particle Board (12" x 4' - Lowes/Home Depot)
    - Decorative Fabric preferable with a Theme of your choice (1.5 yards)
    - Solid Fabric (1/2 yard - preferable matching the background of your other fabric)
    - Printable Iron on Fabric sheeting (JoAnn's or Michaels)
    - Batting
    - Three (3) Decorative Hooks
    - Scissors
    - Screws & Screw Driver
    - Staple Gun
    - Iron
    ***
This is how you do it:
    • From your decorative fabric cut out one of your most favorite scene or building 
    • Take it to your closet Kinko's/Copy shop and ask them to copy the design of the small fabric piece onto the larger printable fabric sheet (8" x 11")
    • Now take one of the wooden particle boards and cover it with a thin layer of  batting material
    • Next take your decorative fabric and place it on top of the board (&batting) 
    • Fold the fabric neatly over the edges of the board and staple it in the back When pulling the fabric over the edges make sure you keep the design straight and without wrinkles...
    • Repeat the same process with the second wooden board...
    • Take the third board and cover it the same way as the first two except this time use the solid fabric
    • Next take your previously printed iron on fabric sheet and place it close to the bottom center of the board - then take your pre-heated Iron and carefully go over the sheet several times until it completely sticks to the solid fabric 
    • Finally screw the decorative hooks into the board (center/top) 
    • Now find a good spot in your house for this awesome creation...


              Voila... all done
    Happy hanging....

Tuesday, April 10, 2012

It's Summer Summer Summer time ....

I am sure you are about as ready as I am.... and you can hardly wait for this years relaxing beach summer fun time  to start. 

So I thought... while we are waiting we might as well get a  head start with a little bit of the beach fun stuff right here at home with some of these gorgeous...


Ocean themed candle lights


What a quick and easy deco idea... and all you need is:

  • Tall Drink Glasses 
  • Glas coasters or dessert plates 
  • Some pretty Ocean theme pictures or post cards 
  • Transparent or Tracing Paper (Printable kind
  • Superglue
  • Tea lights 
  • Sand 
  • Sea shells 

Easy does it...

  • Copy your Ocean theme pictures onto your transparent paper 
  • Take the super glu and dap a little onto the back edge of your transparent picture 
  • Place the glued side of your picture onto the glass then add a little more glue to the second back side of your picture 
  • Wrap it tightly around the glass and wipe off any access glue 
  • Place the now pretty decorated glass onto the coaster or dessert plate - sprinkle some sand and a few decorative shells around it.... 

                 Voila all done....  

                             Quick and easy as always


Monday, April 9, 2012

Summer + Sun + Fun + Friends = Party time


Guess what... It's almost Summer Sun Fun time....
Which means you are probably going to have a few super awesome summer fun party's over the next several months or at least I hope you will....
So I thought I could throw you a few unique and outstanding decorating ideas for your next summer fun gathering ->
So how about it.... here are a few "cool" ideas that most likely are going to be a "Named Hit" ..... 
Hello & Welcome from the Deep Sea's  .....


Tonight we are making Memories ......


Pasta anyone....


Isn't this cute.....


For the Sushi Lovers .....


Lemony fresh.....


Ice Cold Summer Blues ....


Well and here are the things you will need for each "Summer Cool" Plate settings....
Enjoy and I mean really enjoy your "Summer Fun Party Times"
Seashell.... Plate setting:
  • One large Shell
  • Clear Tape
  • Pretty Plate
  • Napkins
  • Silverware 
Making memories... Plate setting:
  • White Paper
  • Small Wooden Bowl
  • Small Rocks & Sea shore finds
  • Feathers
  • Blue Ribbon
  • Blue Marker
Pasta anyone... Plate setting:
  • Small Laboratory Glass
  • Colorful Pasta (uncooked)
  • Colored Poster board
Isn't this cute.... Plate setting:
  • 2 Pages of natural Poster board (medium size)
  • Pen (Calligraphy)
  • Zick Zack Scissor
  • Needles & Silver Floral Wire
  • 1 Bag of Doll House Silverware
For the Sushi lover... Plate setting: 
  • Large Leaves (at the Asian market)
  • Chinese Sticks
  • Toothpicks
  • Permanent Marker
 Lemony fresh... Plate setting:
  • Lemons
  • Yarn
  • Colored Paper
  • Black Permanent Marker
  • Small Wooden Clothes pins
 Ice Cold Summer Blues..... Plate setting:
  • Clear Foil (for Gift baskets)
  • Silver Permanent Marker 
  • Paper clips

Sunday, April 1, 2012

** Groovy Flower Power Retro Re-Do **


I always loved the 70's style, I am not even sure why...well ...  
minus the awful poison Green & Orange wall paper of course and some of the strange looking fashion styles ... 
Then again never mind about that because those flared hip hugger jeans and little funkydelic t-shirts somehow took over my closet yet once again ;P
Anyway ... 
I love how all this Retro Decor style is slowly but surely making a come back into everyone's home and I noticed that more and more of my customers are going back to that cool retro look, which I think its great because it makes me have even more fun with this business of mine :)
Of course many people believe that they absolutely have to dive into one of the modern high priced furniture stores just so they can be "groovy" with style! 
Perhaps there are times that you should check in the high end shop first, especially when you are planning on purchasing a larger furniture piece but for all the other things I recommend a couple other places, 
like your local flea market or your neighborhood yard sale, 
because those are some of the best places to find retro stuff ...
It's just like the say -->
"One Man's Trash Is Another Man's Treasure" 
and trust me I know because that has been the truth for me several times while hunting for special treasures...

- NC State Surplus  - Furniture for under $10.00 -
However several years ago I learned that our local "NC State Surplus" office (or any State Surplus office) is "the" place to go if you are looking for some nice well made retro furniture pieces - for your next flower power re-do project!

I can assure you that you will have absolutely no problem finding some real pretty but funky looking fabric. As far as I know it is on sale everywhere or at least with my favorite fabric vendors ...

Anyway long story short - 
Just check out the beautiful pieces below ... 


Amazing what can become of a ugly duckling piece of furniture after just a few hours of well deserved TLC ....

> Before <
> After <

Or how about this beauty .... 


Now this fabric pattern is the absolute, and I mean absolute hit this year! You MUST have something in your house with this style or you are simply not "hip" ....


 If you ask me - yellow never looked more beautiful ...

                           Estimated found at a State Surplus for $10.00 ea + 5 yard of yellow Fabric ....


Now let's say ... 
You suddenly remember that you actually have an old chair hidden in that back corner room and think that with a little "Re-Do Magic"
it would make a great added furniture piece .... but you not sure about doing this yourself ... well just contact us 

               We are more then happy to do the Re-Upholstery job for you :)